The Amazing Pi-Hole

The Pi-hole is a DNS sinkhole that protects your devices from unwanted content without installing any client-side software. Lets break this statement down for you. Once the Pi-Hole is setup and configured on your network a device makes a request for a URL and in this example we will use google.com. URL to IP address look up is handle by your Domain Name System (DNS) which is the phonebook of the Internet. Normally your DNS is set by your (ISP) Internet Service Provider but since you have a Pi-Hole you are now in control of this IP lookup process. Now you can add URL’s to your black list in the Pi-hole server settings and it will come back to the device as the site is not reachable. You can also add Ad list that will effectively remove ads from every device on your local network. This changes everything when surfing the web ad free, it is amazing.
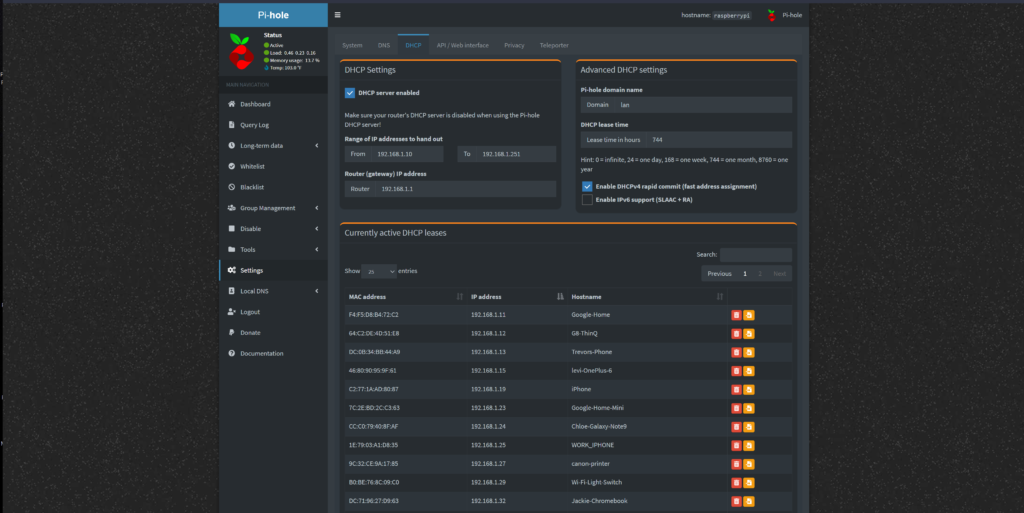
For even more control over your home network and to be able to monitor everything you need to also setup (DHCP) Dynamic Host Configuration Protocol on the Pi-Hole. This feature is not required but really nice to have and adds a ton features like groups and clients that you can manage user devices with and what they are allowed to do or view on the Internet. DHCP hands out IP addresses on your local network to devices. When a new device connects to your network it request an IP address and the DHCP is in control of handing them out and making sure that 2 devices do not get the same IP address. You can also use DHCP to set Static IP’s.
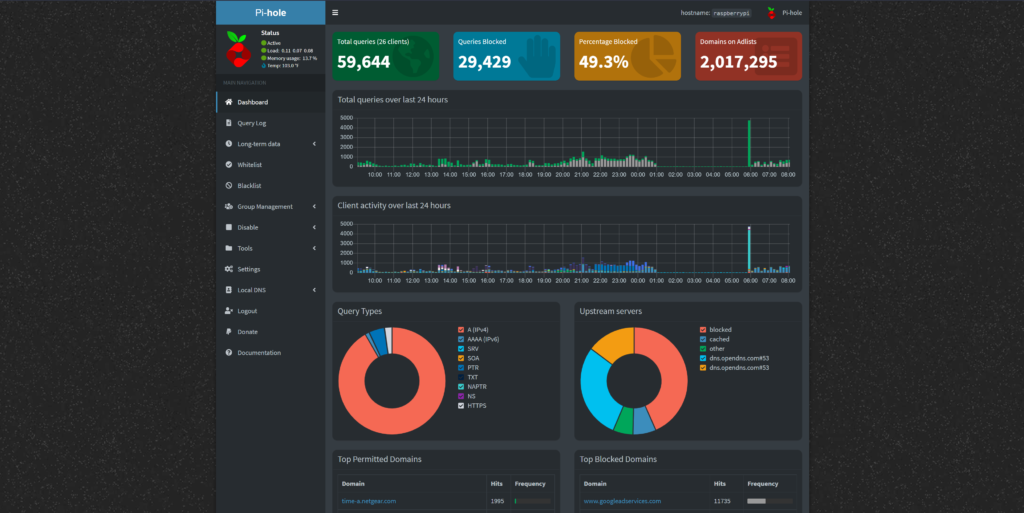
Once setup the Pi-Hole has a really nice web interface you use to access all of your settings and control everything on this DNS server. Now that you understand why you need this amazing Pi-Hole lets talk about how to get one for your home network.

I am blocking over 2 million websites and 49% of my URL request are being blocked. What a beautiful thing.
Pi-Hole DNS Setup Overview
- Purchase a Raspberry Pi mini PC and micro SD card. https://amzn.to/3uTMWlG
- Install Raspberry Pi OS on to the SD card https://www.raspberrypi.com/software/
- Run a terminal command to install Pi-Hole and follow setup steps. https://github.com/pi-hole/pi-hole/#one-step-automated-install
- Once the Pi-Hole is setup with a static IP you need to tell your router that the Pi-Hole is the new DNS and kick that ISP to the curb. https://docs.pi-hole.net/main/post-install/
- Now you can access the web interface with the static IP you set for the Pi-Hole and the user and password you setup as well. Example http://192.168.1.100/admin/index.php
Pi-Hole DHCP Setup Overview
- Log in to your Router which is normally found at 192.168.1.1 with default username Admin and password password.
- In your Router settings find your DHCP toggle switch and turn it off.
- Log in to your Pi-Hole Web interface and enable it as the DHCP. https://discourse.pi-hole.net/t/how-do-i-use-pi-holes-built-in-dhcp-server-and-why-would-i-want-to/3026
- Set your Pi-Hole static IP with your new DHCP server to make sure it does not change.

Before starting any project like setting up a Pi-Hole I always recommend read read read and read again. Make sure you have a really good understanding of what you are doing before you start. Get all of the tools you will need together and probably watch a couple youtube videos about it as well. Last never start a project like this without giving yourself time lots of time.
Also this can be done in many steps
- Get Raspberry Pi OS setup on a Raspberry Pi.
- Install Pi Hole on the Raspberry Pi.
- Configure your DNS on your router.
- Configure your DHCP on your router.
Basically you have 4 different jobs to complete. Have fun and if you have any questions about this please comment below I would love to help.
RootJunky

